 2FA
2FA
Google recently announced that it’s planning on making so-called “passkeys” the default option for logging into Google accounts. So, the next time you sign in to YouTube, Gmail, Google Docs, Google Maps, or any other app from the search giant, you’ll most likely be prompted to create such a passkey.
In this post, we discuss where you can set up passkeys for your Google account, what options are available, and what to do if you encounter difficulties. But first, let’s talk about what this technology actually is and how it works.
What are passkeys?
Passkeys (a combination of “pass” + “key”) are developed by the FIDO Alliance, an organization with a mission to create new authentication standards that will eventually reduce humanity’s reliance on passwords. If you have a hardware access key — often called a YubiKey (as the most popular brand) — you’re already familiar with one of the FIDO Alliance’s developments.
Passkeys are the next stage in the evolution of new authentication technologies. Previous FIDO Alliance developments focused on additional authentication factors — secondary login verification options working in conjunction with universally hated passwords. Passkeys, on the other hand, are designed not to supplement but to entirely replace passwords.
The major tech giants — Apple, Google, and Microsoft — have already integrated support for this technology into their infrastructure and are ready to allow users to abandon passwords. In fact, Google is planning on encouraging users to do so in the near future.
Unfortunately, the FIDO Alliance didn’t provide a standard translation for the term “passkey” from English to any other language. Therefore, companies implementing this authentication mechanism can call it whatever they want, without much regard for their peers. А common term has not yet been chosen in French, Portuguese, or even Spanish.

How Apple, Google, and Microsoft name passkeys in different languages
How passkeys work and why all this is needed
Passkeys completely replace passwords, eliminating the need to create or remember sequences of characters.
Here’s how it works. When a user registers a passkey on a service, a pair of related encryption keys is created — a private key and a public key. This is called public-key cryptography. The basic idea is that if you encrypt something with the public key, it can only be decrypted with the private key.
So, the private key stays on the user’s device, while the public key is sent to the service. These two keys are then used to encrypt the dialog that occurs when a user logs in to the service:
- The service sends the user a request encrypted with the public key, containing a very large random number.
- The user’s device asks them to confirm that they are indeed the user. Usually, this is done through biometrics, like placing a finger on the sensor or looking into the camera, but a PIN code can also be used.
- Upon successful confirmation, the user’s device decrypts the request from the service with the private key and retrieves the random number from it. Without the private key, nobody can decrypt this message correctly and obtain the secret number.
- Based on this random number from the service’s request, the user’s device creates a digital signature with a certain algorithm — it calculates a new very large number — and sends it back to the service.
- The service, on its end, performs the exact same calculations and compares the results. If the calculated number matches the one it received from the user’s device, the request was decrypted correctly. The user therefore possesses the corresponding private key, and they are must be authorized in the service.
As you can see, under the hood, this mechanism is quite complex. But the good news is that all the cryptographic magic is completely hidden from the user. In practice, it’s very simple: you just need to press the “Log in” button and place your finger on the sensor (or look into the camera). All the complicated work runs in the background on your smartphone or computer.
Why is this even necessary? Passkeys are an attempt to simultaneously strengthen security and simplify the user’s life. The former is achieved by replacing passwords, which are not so reliable, with extremely robust encryption keys. The latter is accomplished by eliminating the need for users to come up with something, remember it, and perform any additional actions for two-factor authentication.
Thus, passkeys are designed — in theory — to provide the highest level of security without requiring any effort from the user.
How to set up access to your Google account with a passkey instead of a password
Now let’s talk about how this all works in practice and how to set up access to your Google account using passkeys. It’s very straightforward. Here’s what you need to do:
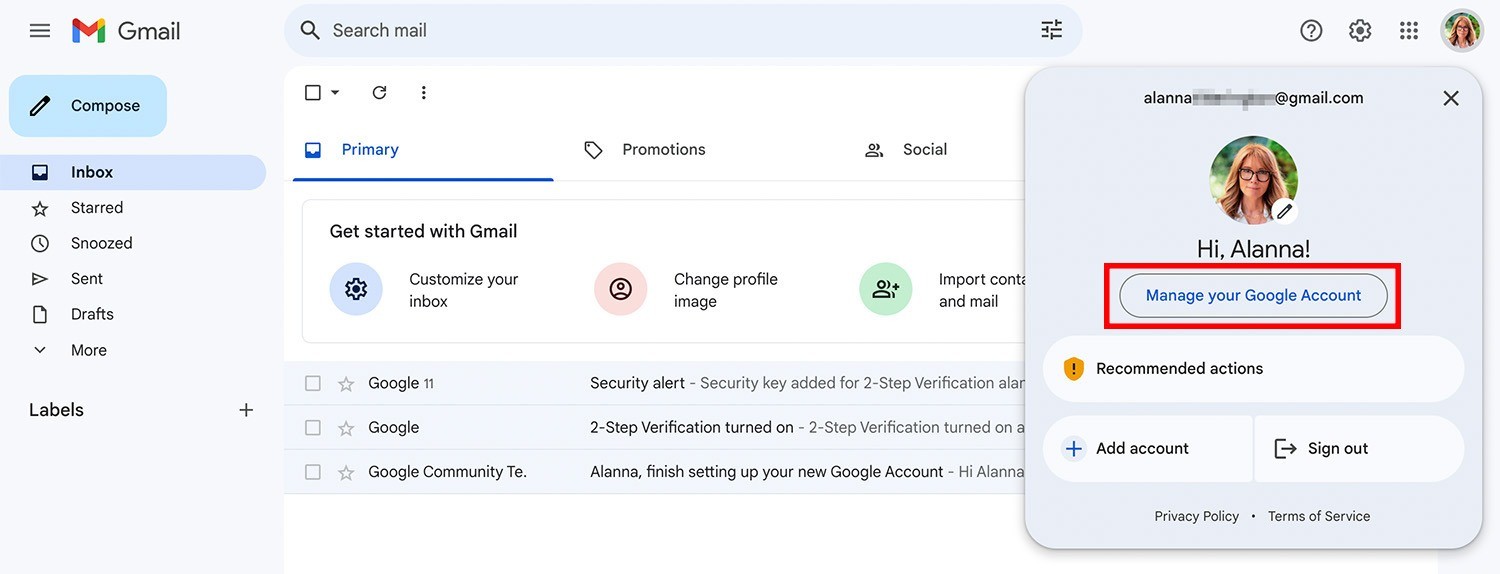
- Go to your Google account settings. You can do this through any Google service (such as Gmail) or directly through the Google Chrome browser, which you might already have. To do this, click on your avatar in the top right corner of the screen and select Manage your Google Account.
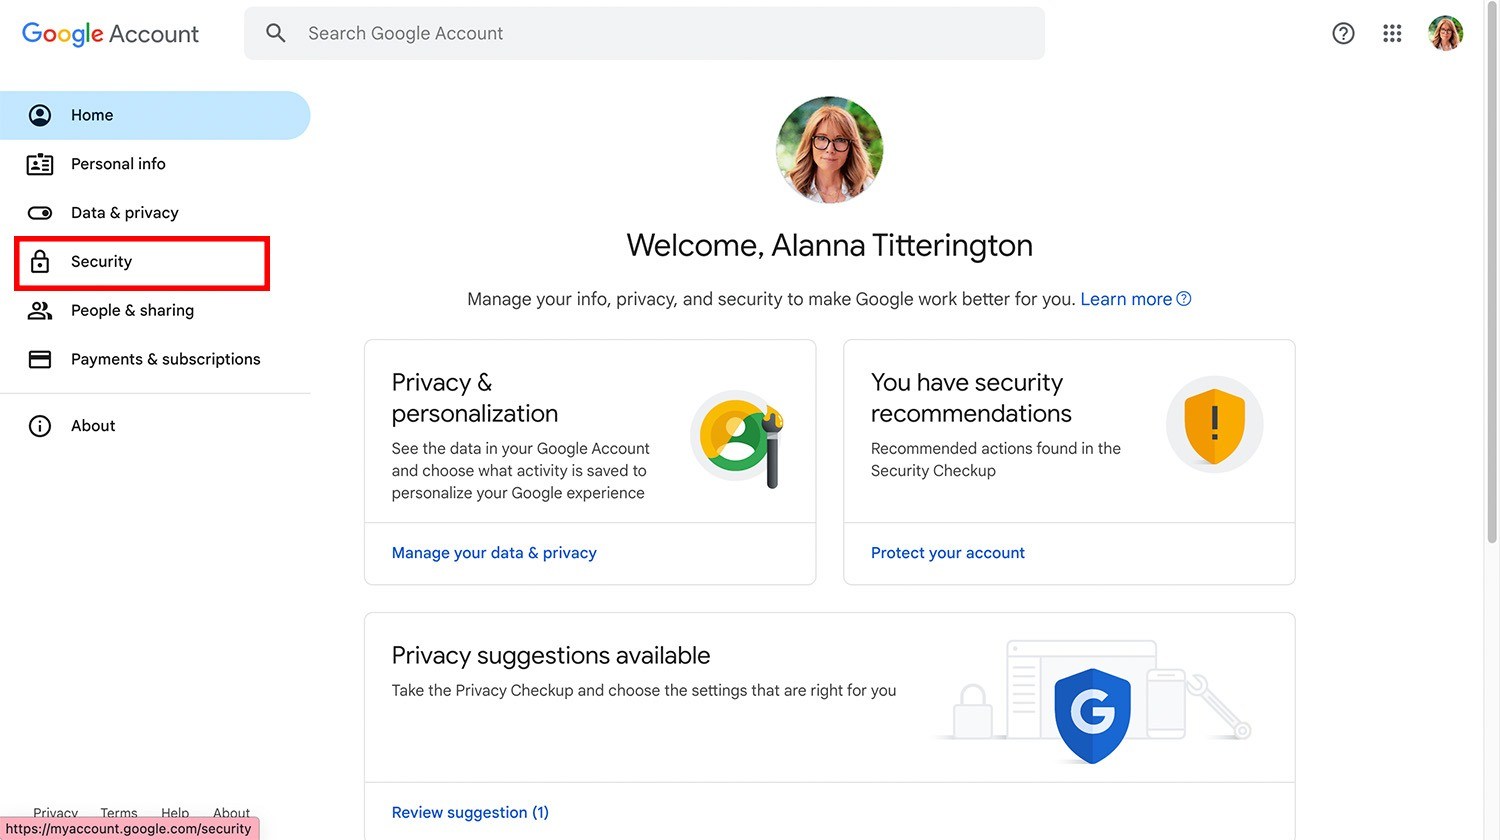
- On the page that opens, select Security.
- Scroll down to How you sign in to Google section.
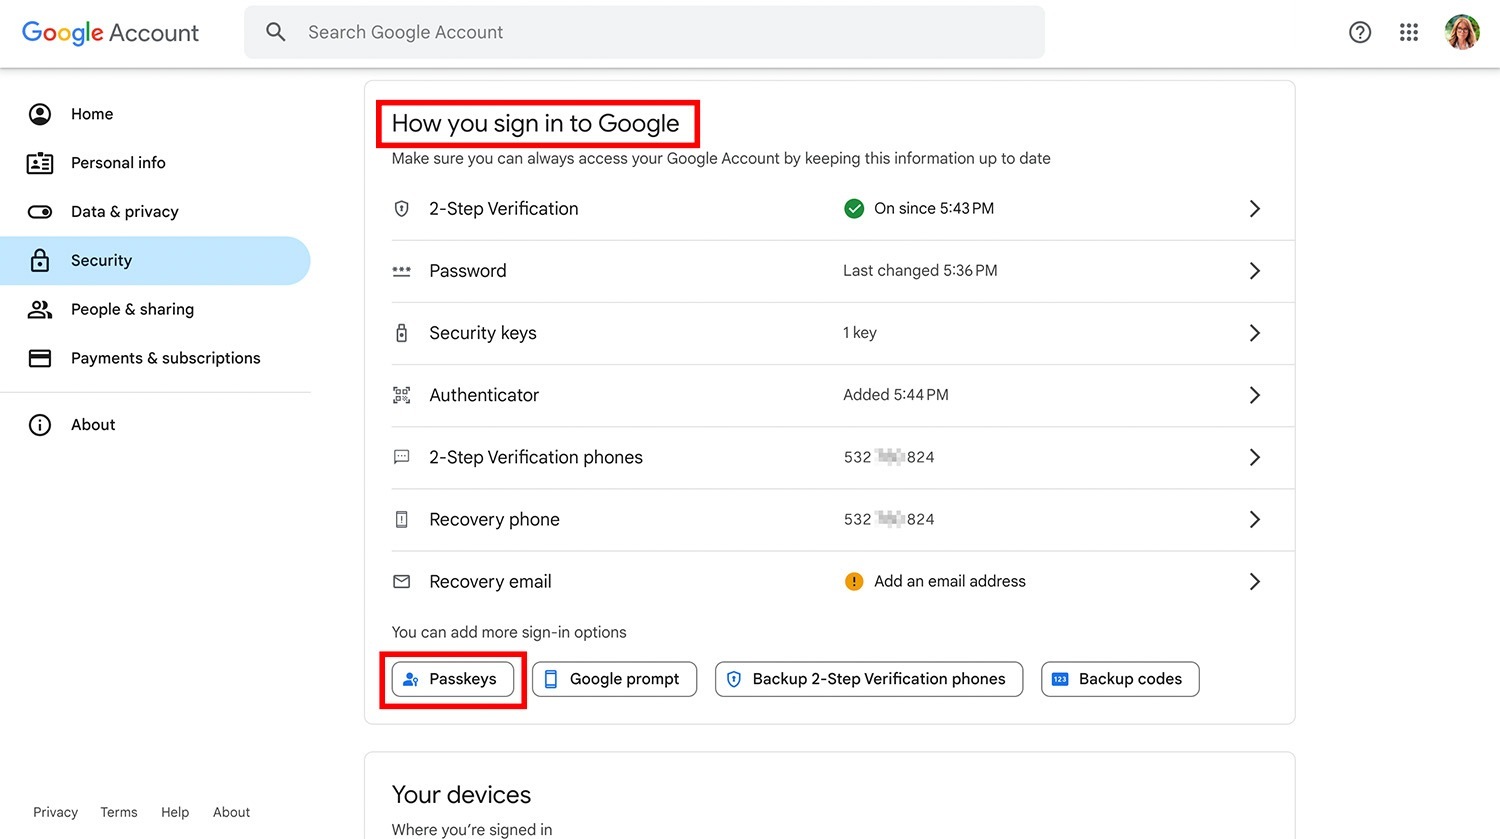
- Under the list of different sign-in verification and account-recovery options, find the Passkeys button and click on it.
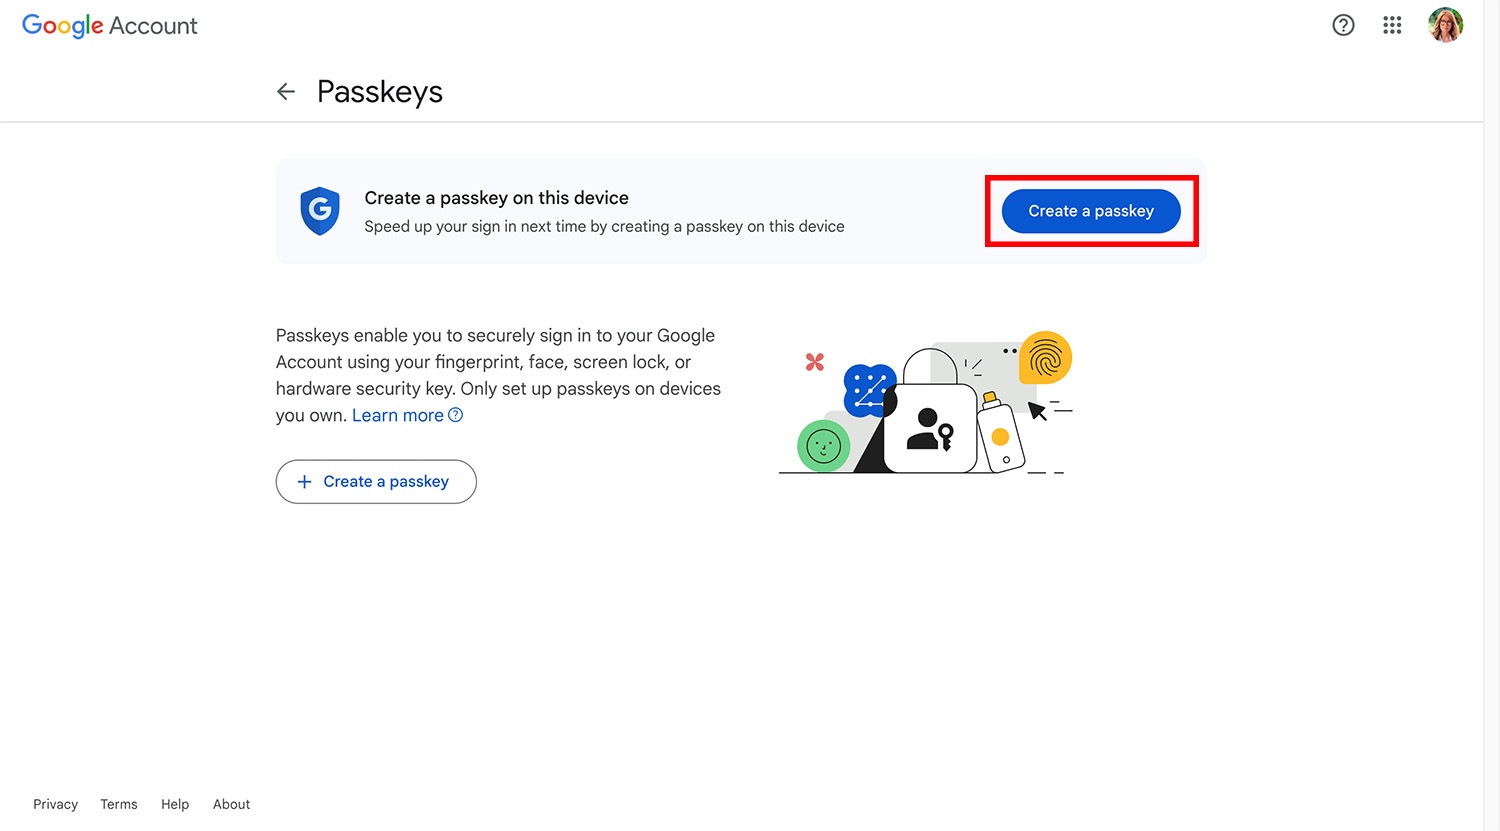
Next, various options are possible, but for starters, I suggest creating a local passkey on your computer, so that you no longer need to enter a password to log in to your Google account in the browser. To do this:
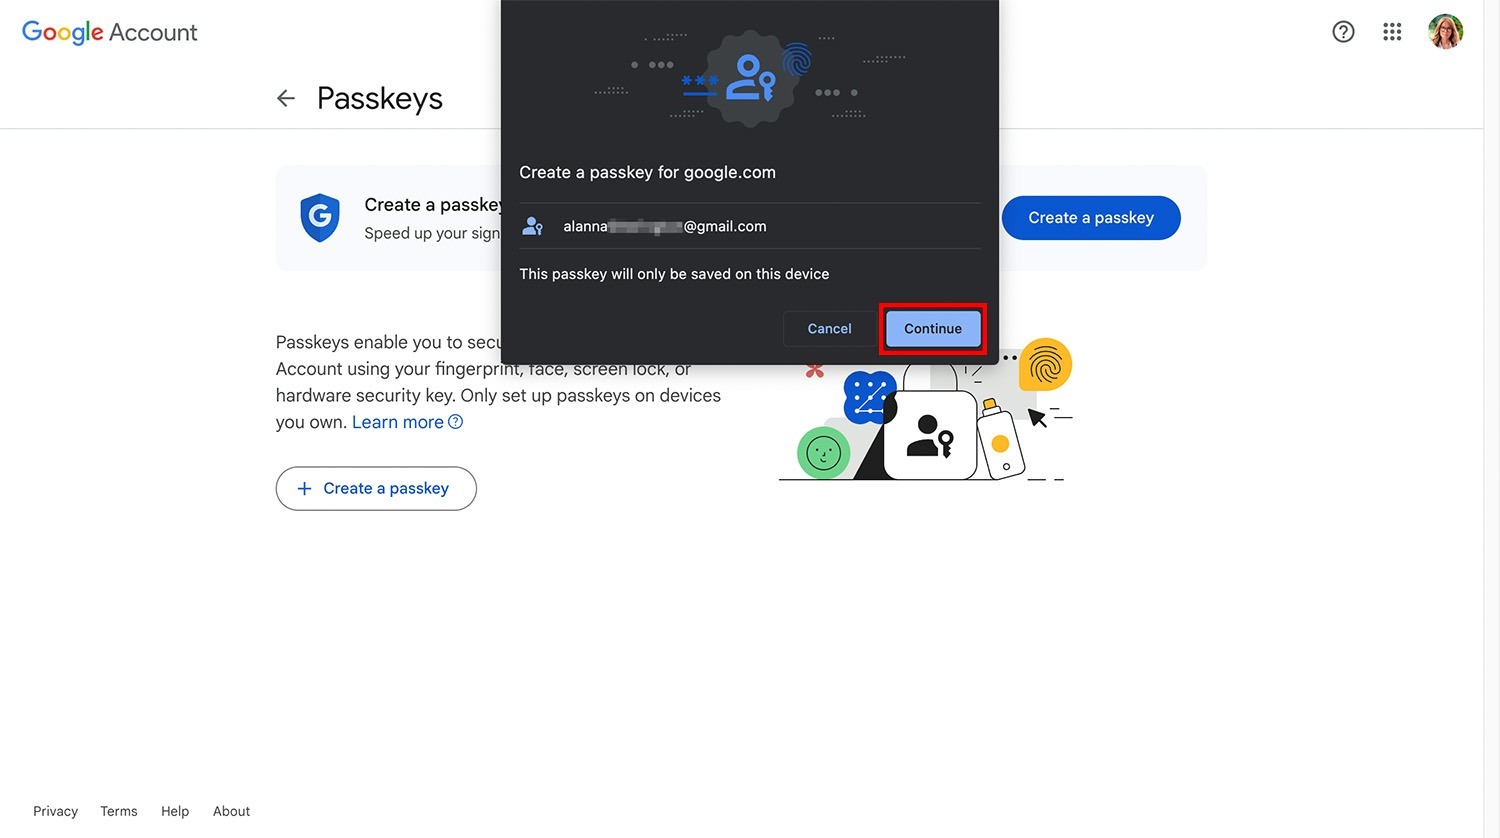
- Click on the blue Create a passkey button at the top of the screen.
- In the pop-up window, click Continue.
- After that, confirm the action using the method you use to unlock your device — in my case, it’s fingerprint recognition.
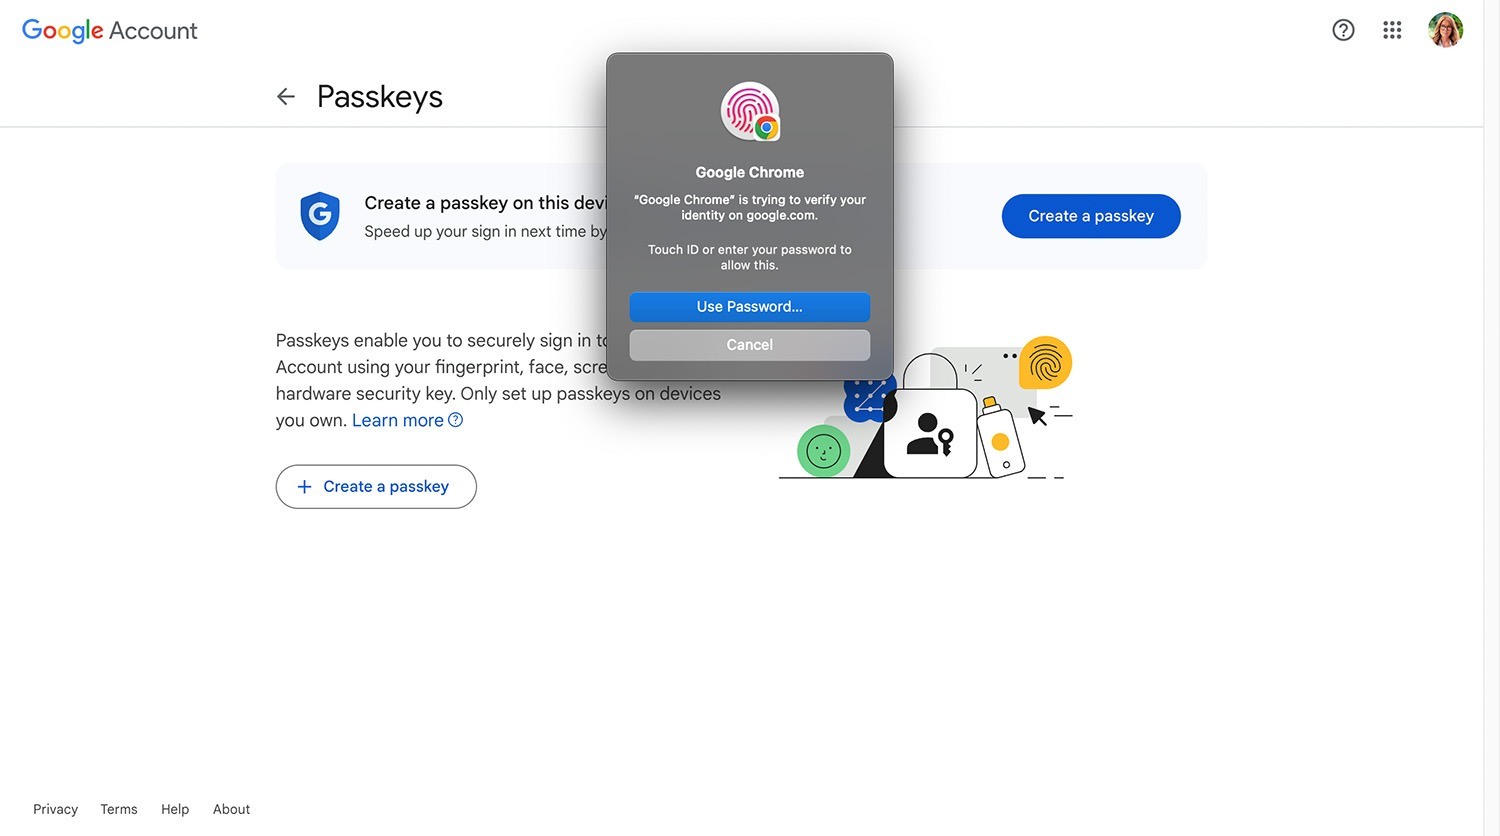
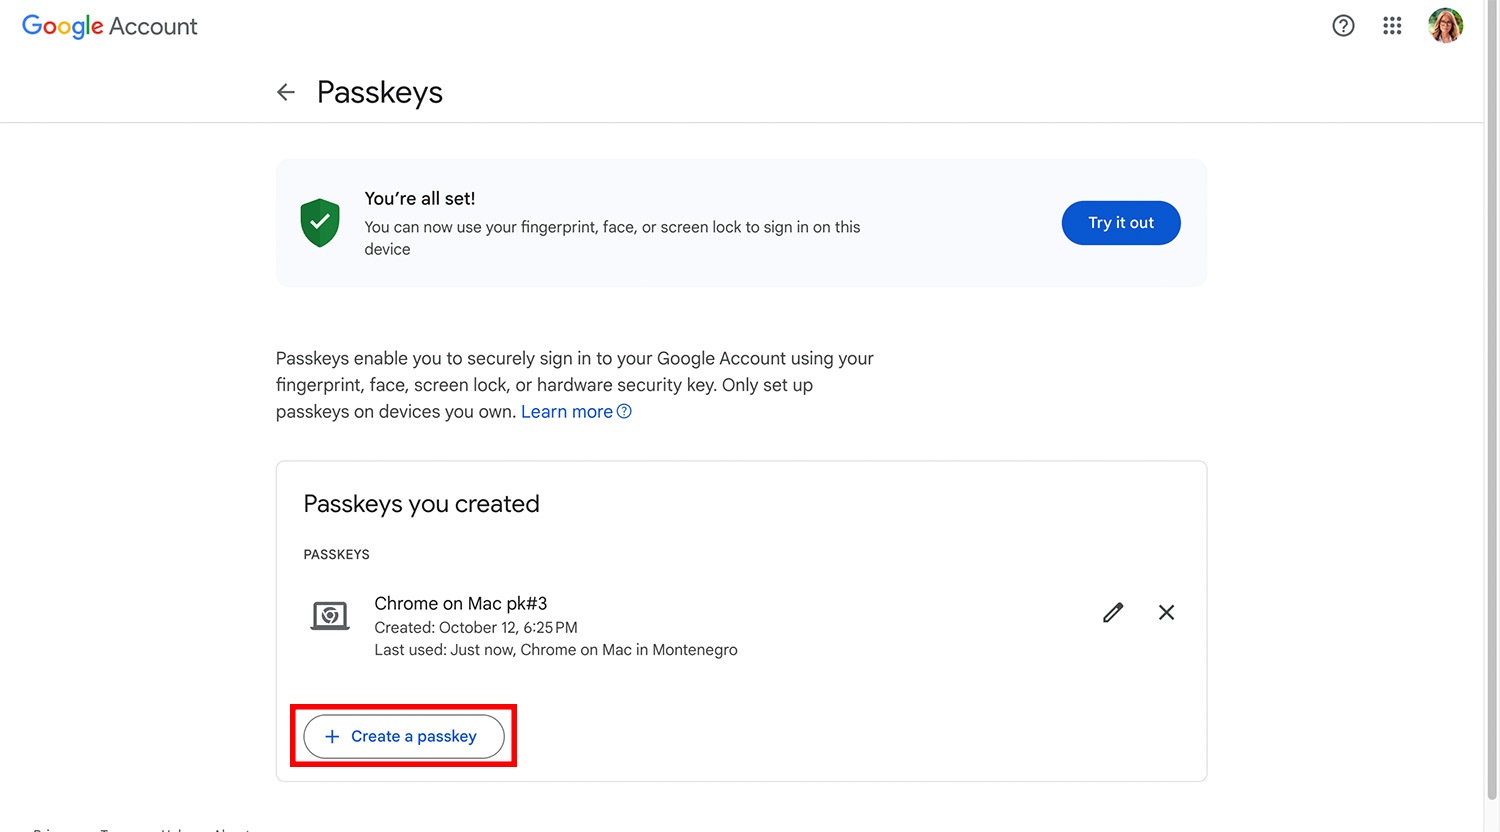
- Congrats! You’ve created a passkey and can now sign in to your Google account in this browser without a password.
Now let’s create another passkey on your smartphone. This allows you to sign in to Google without a password on this smartphone. And this same passkey can be used to sign in on other devices — via Bluetooth.
Before you begin, make sure Bluetooth is enabled on both your smartphone and computer, and grant the browser permission to access it (if this hasn’t been done already). Next, follow these steps:
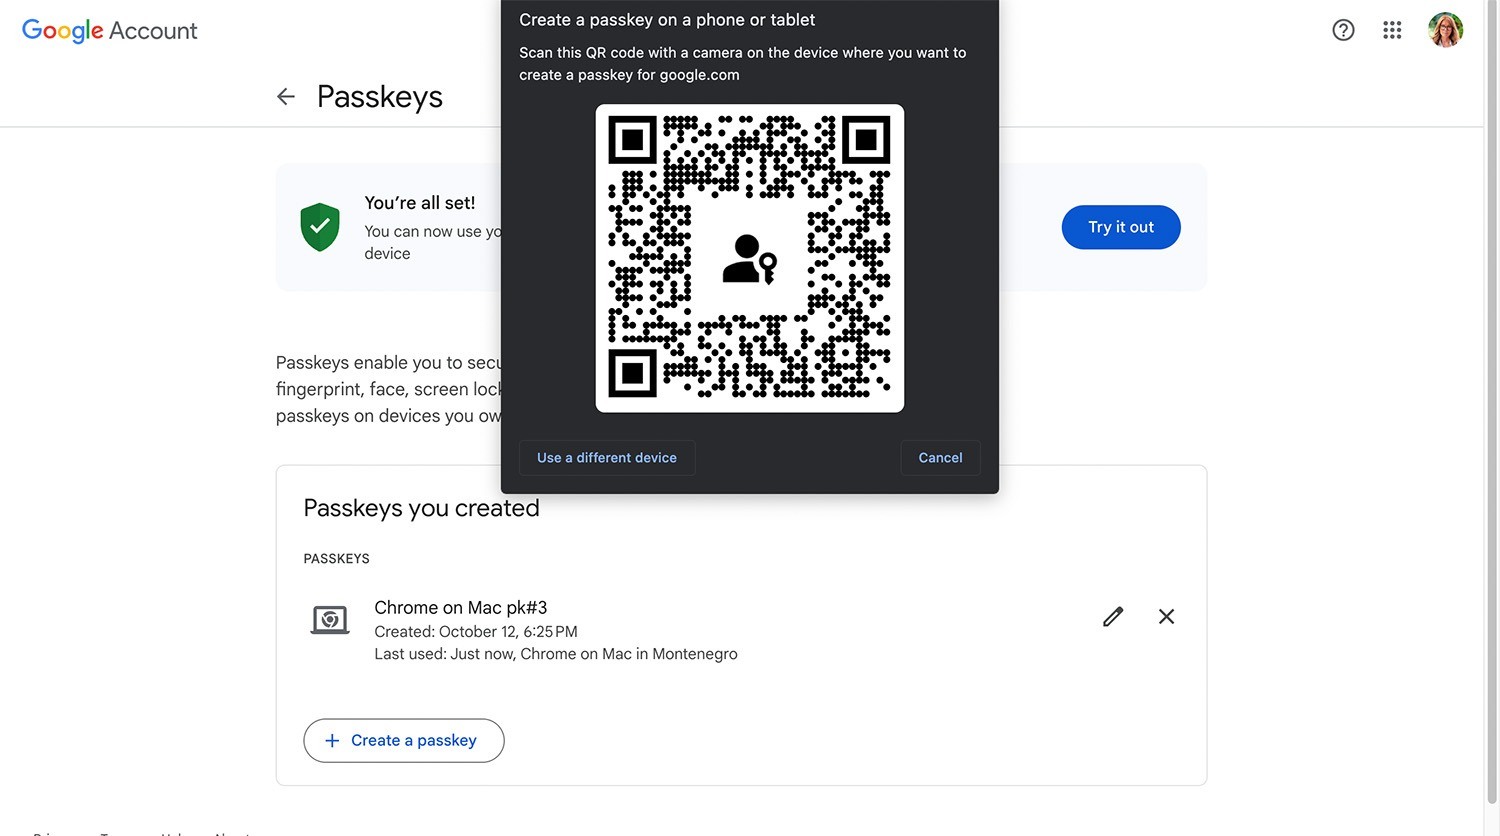
- Return to the Passkeys page and click the white Create a passkey button at the bottom of the screen.
- In the pop-up window, select Use another device.
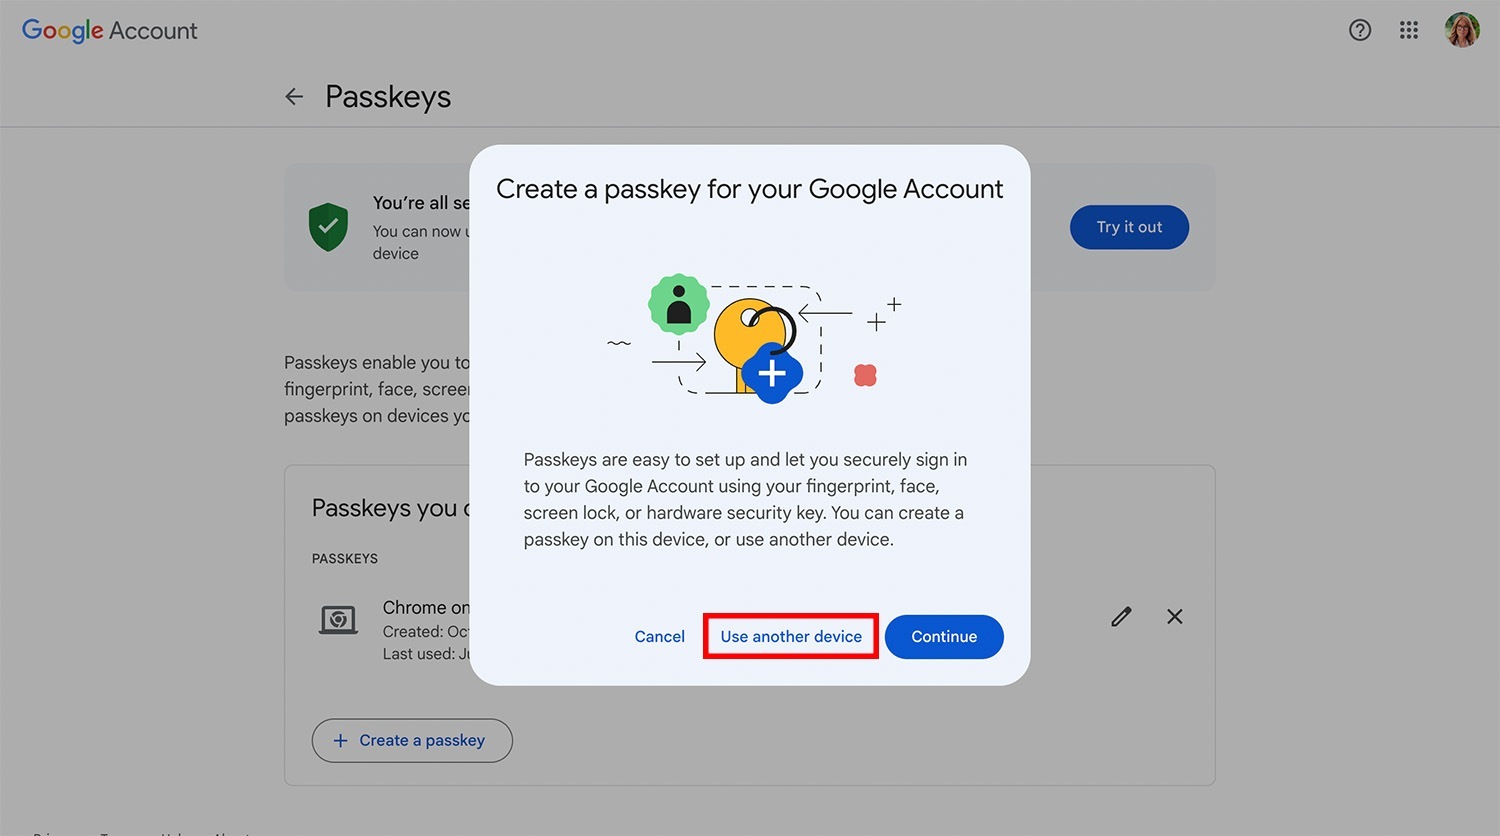
- Another pop-up window will appear with a QR code — scan it with your smartphone’s camera.
- Then, confirm the creation of the passkey for your smartphone with the method you use to unlock it.
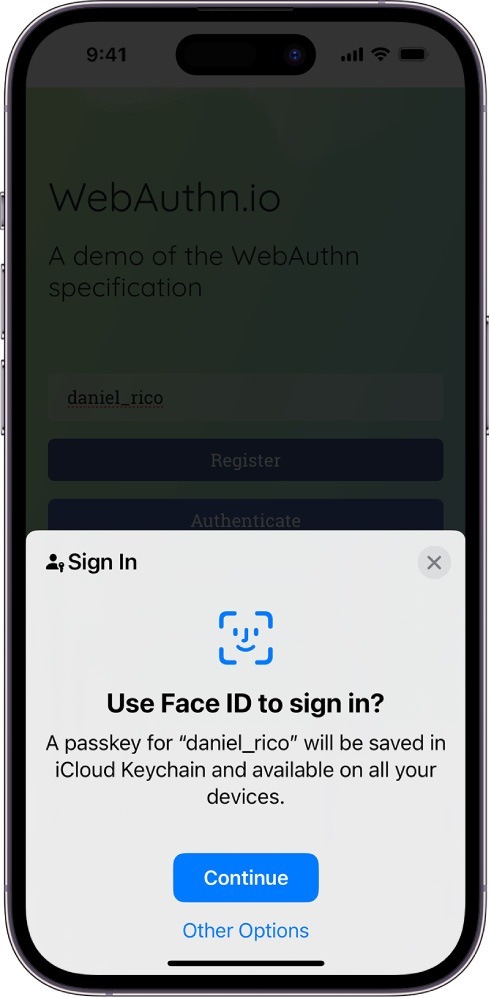
Confirming the passkey registration on iPhone. Source
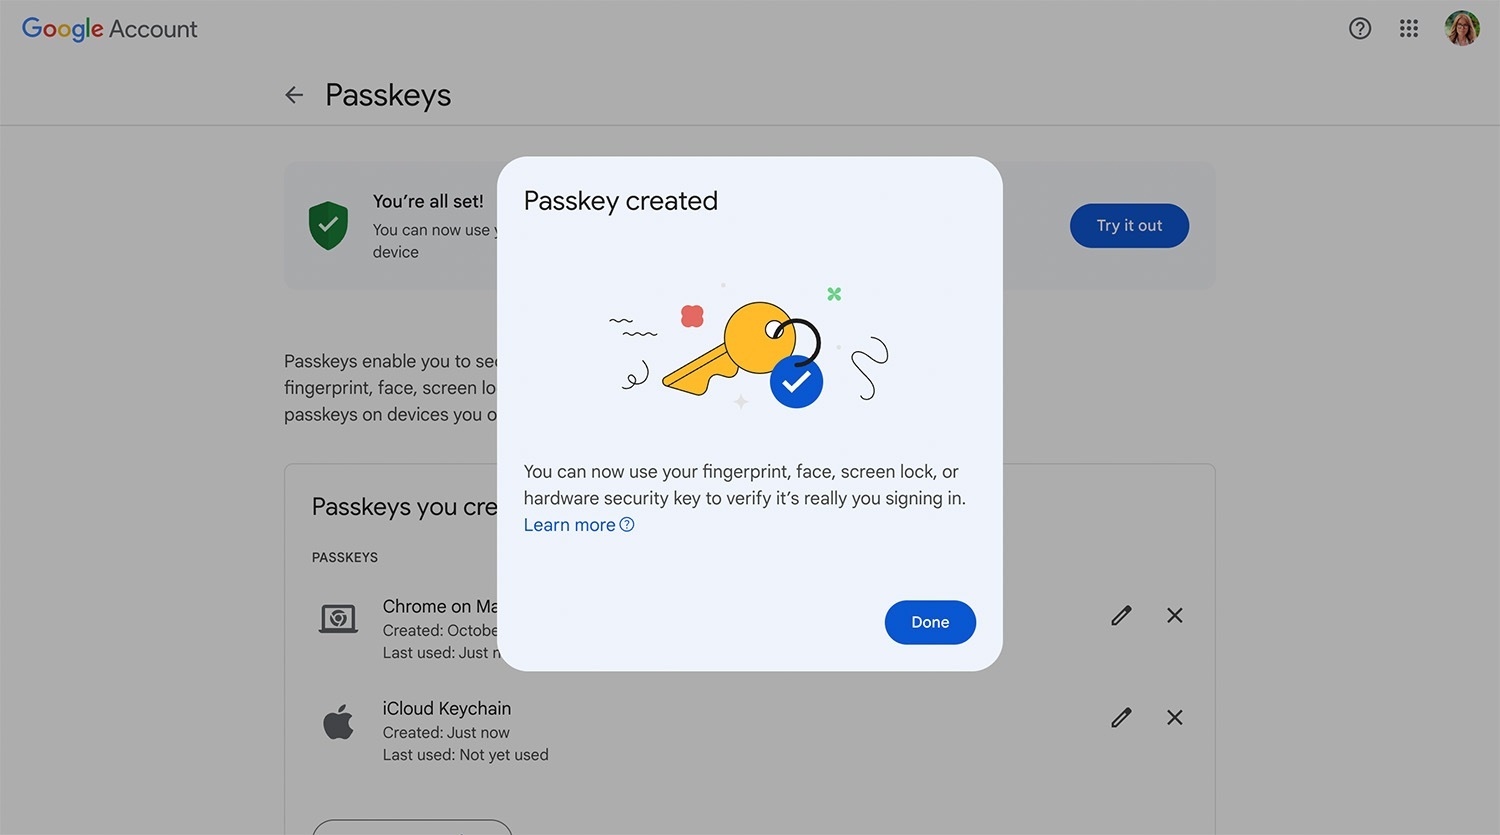
That’s it! You’ve created a passkey on your smartphone as well. Using it, you can sign in to your Google account without a password on any device. It’s possible to create multiple passkeys — so if you have many devices, you can have a key for each.
Additionally, you can store passkeys using a hardware authenticator — also called security key or YubiKey, after the most well-known brand. However, not all hardware authenticators will work: you need a YubiKey with a built-in login confirmation mechanism — a PIN code or fingerprint. If you try to create a passkey on a YubiKey without such a mechanism, the registration will be successful, but when logging in, you’ll still be asked to enter the account password — defeating the whole purpose of the endeavor.
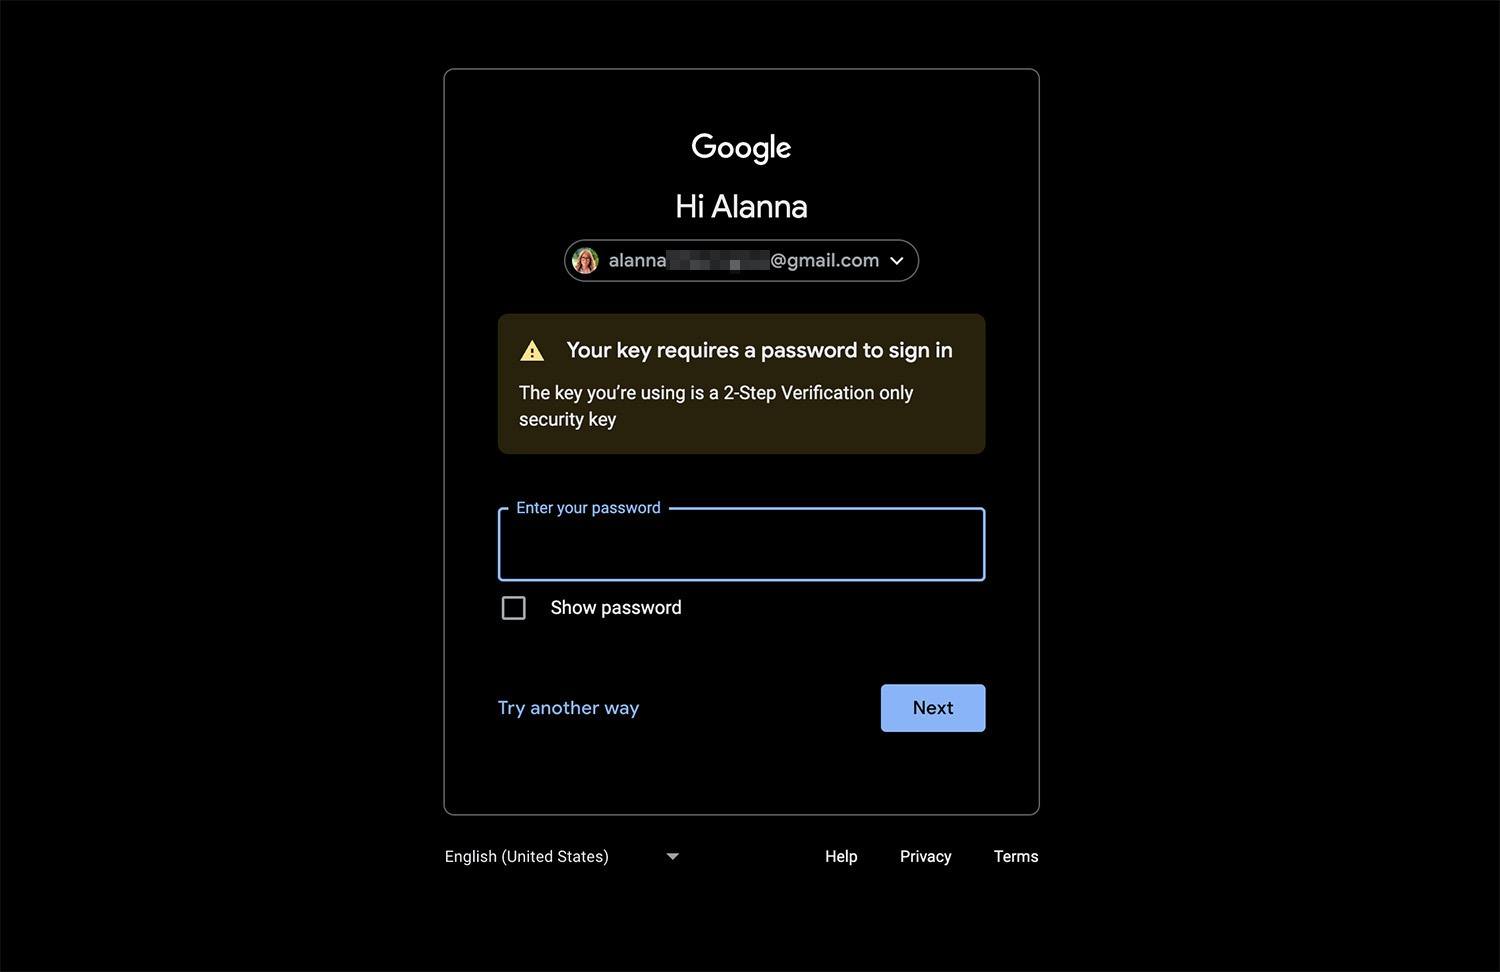
It’d be nice to receive this warning during the key registration process — not when you’re about to use it to log in to your account
Backup plan: passwords and one-time codes from the app
The login confirmation mechanism using passkeys is highly automated — with all the complicated procedures isolated from the user. So, as long as everything is working fine, logging in with passkeys is really convenient and easy. However, this isolation also has a downside: when something doesn’t work, it’s nearly impossible to understand what went wrong, why, and how to fix it.
For example, one of the passkeys I created flat-out refused to work for passwordless login. I couldn’t figure out the problem: in my Google account settings it was displayed as active, but it just… didn’t work. Fortunately, I had plenty of other access verification options enabled for that account.

Something went wrong. Thanks, Captain Google!
So, for now, I prefer to think of passkeys as a backup login option that can occasionally save time. But in my opinion, it’s too early to discount passwords and two-factor authentication for Google accounts. Something tells me they might still come in handy when the passkey suddenly doesn’t work. Most likely, that will happen at the worst possible time.
The good news is that since you’ll be entering your Google account password less frequently now, you won’t need to memorize it. Consequently, you can make the character combination as secure as possible — that is, very long and completely random, say, 32 or even 64 characters. And Kaspersky Password Manager can generate and remember it for you.
By the way, in the password manager, you can also receive one-time codes for two-factor authentication — this feature was recently added to Kaspersky Password Manager.
